
Step 1: Installing your Celestia Light Node via the Flux Cloud Marketplace
- We first need to head over to https://home.runonflux.io/
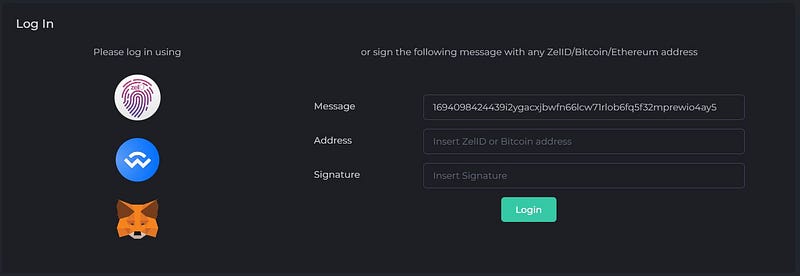
- Once there, click on the desired option under “Log In” to sign in. We support ZelID, accessible through the Zelcore wallet, as well as MetaMask or any wallet that has WalletConnect support.
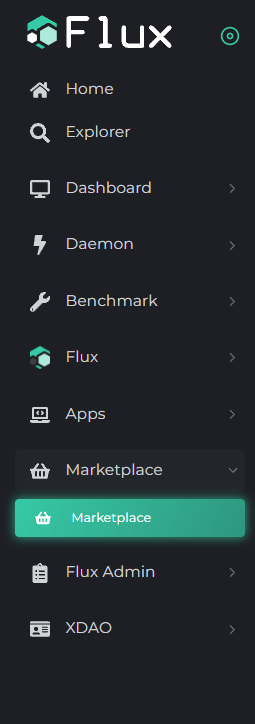
- Now that you have been authenticated, go to “Marketplace” on the left-hand menu. Once there look for the CelestiaLN application — You will find them under the ‘Blockchain’ category.
- You will see something remarkable in this. Just click “Start Launching Marketplace App.”
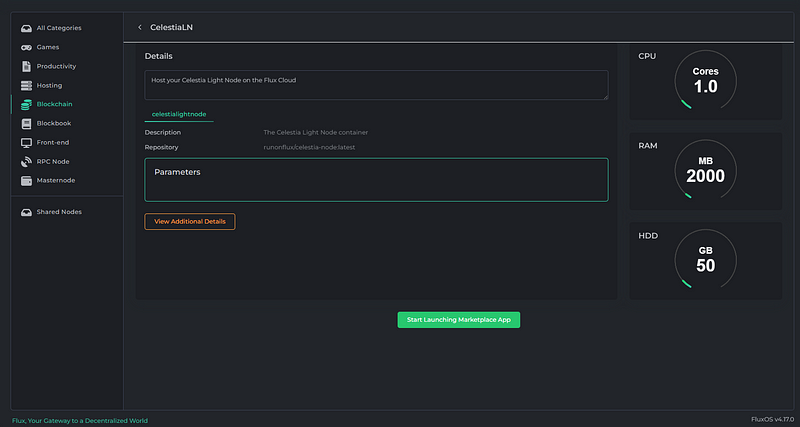
- Next, you will see a screen like this:

- You can click “Next” or copy the Registration Message if you want to sign the message manually using your ZelID App, and then click “Next.”
- Here, you can click the fingerprint button to sign the request for the application. If you have done this manually, paste the signed message from the earlier step onto your ZelID.


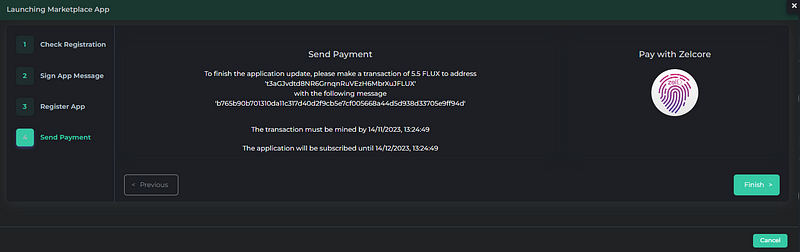
- You will now see the monthly cost for your application. Click on “Register Flux App.”


- You will be given payment information in FLUX. Payment is made through the FLUX blockchain using FLUX coins.
- You’re done! We now need to wait for your Celestia Light Node to be spawned on an available FluxNode, which usually takes around 10–30 minutes. It will then start sycing the light node.
Step2: Finding out your IP address of your Celestia Light Node
- When logged in via your ZelID you can head over to https://home.runonflux.io/apps/globalapps and to the “My Apps” Tab. Here you will be able to Manage and visit your new Light Node deployment that you have just done. Click on the arrow pointing down to see your application specifications and the IPs running it.


- More importantly, you see your “Automatic Domains” which were generated by the Flux-Domain-Manager (FDM). You’ll need the first one listed there, in our case celestialn.app.runonflux.io. This https endpoint is load balancing between your three Celestia Light Node servers (If they are synced 100%)
→ https://celestialn.app.runonflux.io/
- As you can see, your Celestia Light Node is redundant, which means it is always running on a minimum of three instances simultaneously. That means you could use each individual IP as an endpoint as well. Click on “Visit App” to get to its http endpoint. Examples:
→ http://142.132.151.2:26658/
→ http://159.69.142.208:26658/
→ http://82.65.191.45:26658/
Step3: Check the logs of the individual IPs to ensure that the Node is working properly
- Visit one IP by clicking on “Visit FluxNode”
- Log in with your ZelID
- Navigate to “Apps”, “Local Apps”, “My Local Apps”
- Click “Manage”, “Manage App”, “Log File”
- You should see something similar like this (The Node is syncing):
- 2023–11–14T10:00:02.437Z INFO header/store store/store.go:365 new head {“height”: 7169, “hash”: “0E54E21091E1E73066F10FFBCEA436DAE8C58A4272F4D943C39B1C7B2CF45313”}
2023–11–14T10:00:08.935Z INFO header/store store/store.go:365 new head {“height”: 7681, “hash”: “2FC57C76A0B3508112DD2D4D4D9321E42E0D0215827E61734B40865E00D9D986”}
2023–11–14T10:00:12.131Z INFO header/sync sync/sync_head.go:132 new network head {“height”: 102089, “hash”: “DAE7A9269694D49280F915E69D8A2FD84FBC4AB3B21E8FC2D16743CAAC6609A7”}
2023–11–14T10:00:12.243Z INFO das das/worker.go:148 sampled header {“type”: “recent”, “height”: 102088, “hash”: “4B6700AC9000134B96517016A775E09BFEABF7952718CDEAA0903716EC0260C2”, “square width”: 32, “data root”: “FCFCFDC50FF063A3883EC907C2266C0F8B87C2C750F2DA4EEB9CE4273EAC8BEF”, “finished (s)”: 12.311988619}
2023–11–14T10:00:16.742Z INFO header/store store/store.go:365 new head {“height”: 8193, “hash”: “C17D170AA9D480F9F54C24EA54237D5FA4E6DB6F7DA497AD5BC38E4C6FF845B1”}
2023–11–14T10:00:23.745Z INFO header/sync sync/sync_head.go:132 new network head {“height”: 102090, “hash”: “AF38F2D42F984C657277D497BA7D5F93F8A1E52A57E0570C6D3CC5D9C1C1923B”}
2023–11–14T10:00:24.042Z INFO header/store store/store.go:365 new head {“height”: 8705, “hash”: “E7E91C905EB117FF6DE20D0E208F76A77ECED99CC2AA3AC211F5F182F6ABCD55”}
2023–11–14T10:00:24.342Z INFO das das/worker.go:148 sampled header {“type”: “recent”, “height”: 102090, “hash”: “AF38F2D42F984C657277D497BA7D5F93F8A1E52A57E0570C6D3CC5D9C1C1923B”, “square width”: 2, “data root”: “59FDE082B5625A22F06B50FF0A9E6B4F72BD39222BC300F62A34FC01AEDF495D”, “finished (s)”: 0.506486353}
Renewing your Flux Cloud Subscription
- Remember, your Celestia Light Node is only subscribed for 22,000 Flux blocks initially, which is ~ 44,000 minutes (about 1 month). You will need to renew payment after the first month, so itdoes not get kicked off the network. We give you the choice to renew it for a longer terms after the first deployment for up to one whole year. Please do the following:
- Visit https://home.runonflux.io/ and log in with your ZelID
- Navigate to “Apps”, “Global Apps”, “My Apps”
- Click “Manage”, “Manage App”, “Update Specifications”
- Leave all the variables like they are, except the PERIOD field — Adjust it to your preference. Next click on “Compute Update Message”
- Sign the Message with the ZelID App and click “Update Flux App” after
- Click “Pay with Zelcore” to make the Flux Payment
- Voilà your Node has been renewed for your chosen duration
Have Fun supporting Celestia with decentralized Infrastructure!
Learn more about Flux at www.runonflux.io
Learn more about Celestia at https://celestia.org/