
There are multiple ways to run your SimpleX servers on Flux. For SMP & xFTP, you can deploy your servers in the way you want to.

Note: Private or Public Simplex Servers can Run on Flux (password or no password)
- You can run clearnet servers that don’t resolve over Tor.
- You can run hidden services that only resolve over Tor and not clearnet.
- You can have servers that resolve over clearnet and over Tor.
- You can experiment with a clearnet server, by making it capable of transmitting messages to Onion Address over the TOR Network.
In this guide we will be deploying #3 – SimpleX SMP over Clearnet + Tor
In Section 8 we show you how to disable Clearnet to acheive #2
You might want to generate the Server’s Certificate Authority Key offline before backing it up. If so, complete the steps in Section 8 after Section 1.
Run Your SimpleX SMP Servers on Flux
If you follow this guide step by step, you should have your SimpleX server running on flux in no time.
You have the ultimate control over how you manage and pay for your Flux deployments.
This guide assumes that you have Flux in either your Zelcore or SSP Wallet.
Zelcore or SSP Wallet (Click the links to download)
If you wish to pay using fiat, you’ll have that option too.
You can skip using crypto wallets altogether for management by using the SSO options available during the login process. Let’s get started.
This guide will be split into 8 sections. Making them easy to reference.
1. Deploy SimpleX SMP To Marketplace
- Navigate to https://home.runonflux.io
- Login using one of the available options
- Navigate to https://home.runonflux.io/apps/marketplace?q=simplex
- Choose “Private” or Public” Simplex SMP option (password or no password)
- Follow the on screen instructions and pay for the application with Flux, Stripe for Card Payments or Paypal.
It will take roughly 10 minutes for the deployment to become ready.
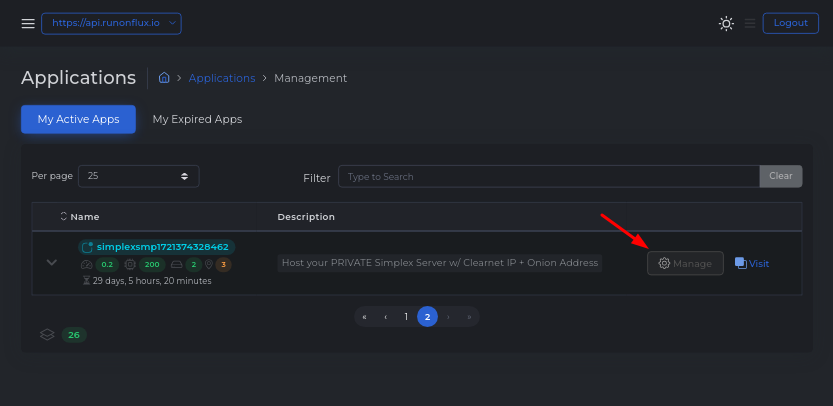
2. Accessing Your Flux SimpleX Deployment
- Tap “Applications” from the side menu bar
- Tap “Management” from the sub menu
- Identify your deployment by name in “My Active Apps”
- Tap the “Manage” button to the left of the app name & description
- Confirm by tapping the “Manage App” button
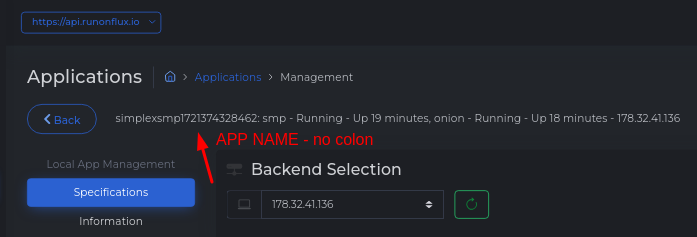
3. Configuring Onion Address On Your SimpleX Server
- COPY your apps name (found next to the blue back button)
- From the inside menu bar tap “Update/Renew”
- Toggle Off “Extend Subscription”
- Toggle On “Update Specifications”

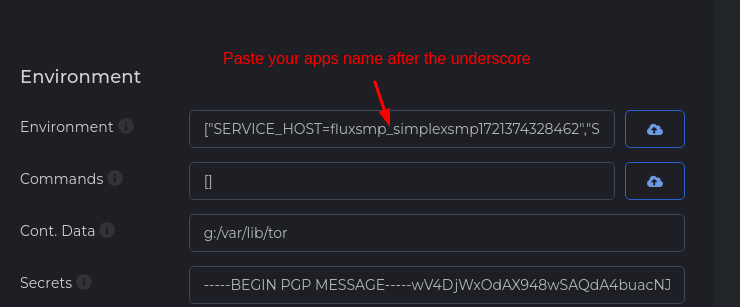
- Scroll down to “Environment” section
- Paste your app’s name after the underscore. !!! NO SPACES !!!
(See screenshot for example)
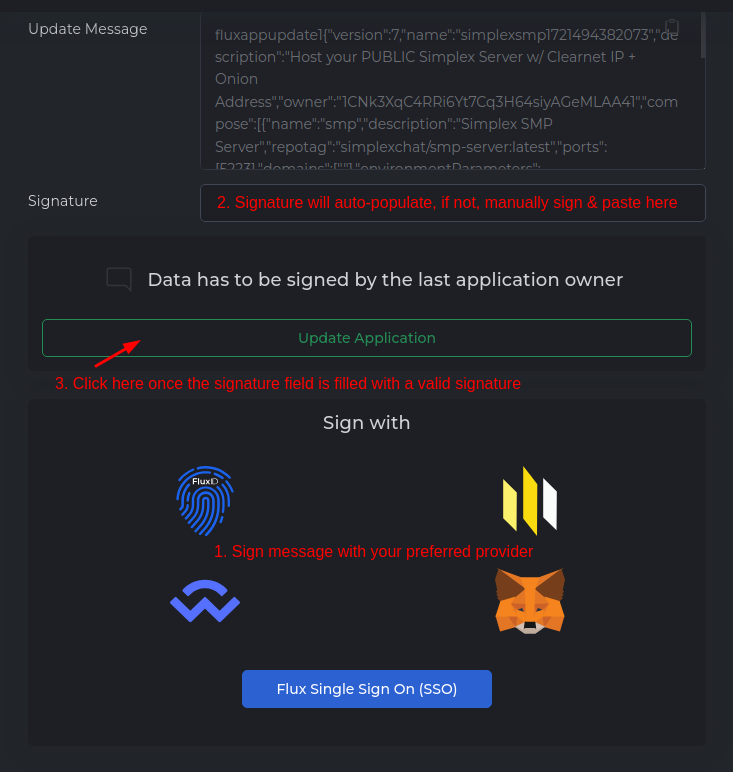
4. Updating The Deployment
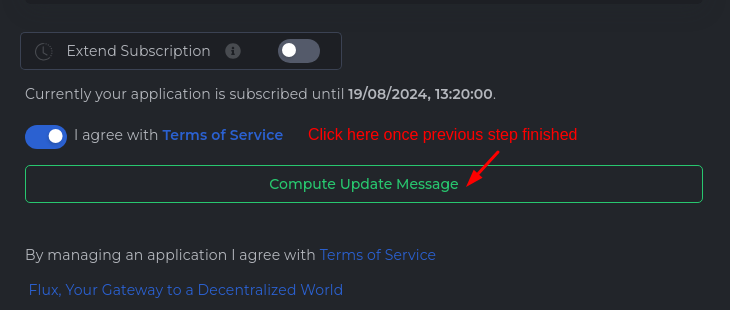
- Scroll down to “Compute Update Message”
(see screenshot for example) - Sign the generated message using your preferred method
- Click “Update Application” to register the update on the blockchain
(see screenshot for example)
5. Force Deployment To Use Updated Specifications
You will need to wait for the update to be broadcasted on the network before completing this portion of the guide.
You can choose to not do these steps and come back later to it already done for you. (This process happens automatically – but takes a variable amount of time)
It may take 15-30 mins for the update to be broadcasted.
Usually less than 5-10 minutes.
- You can manually check by going to the “Specifications” tab
There will be a message letting you know the local and global specs don’t match. Once you see that message go to the next step.

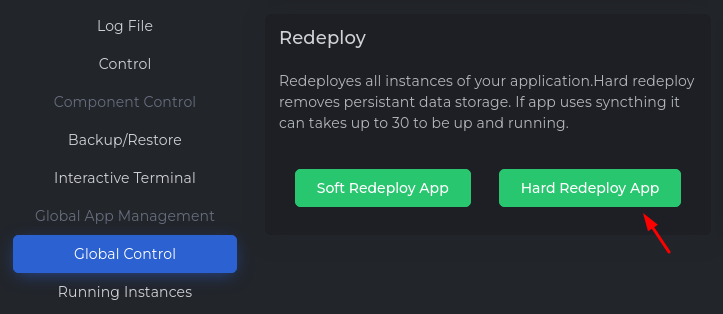
- Now that the update is broadcasted we will do a “Hard-redeploy” from the “Global Control” tab
6. Get The SimpleX Server Addresses From Log Output
- From the inside menu bar tap “Log File”
- Copy the “Server Address” line from the smp component
- Copy the “Onion Address” from the onion component
- Next to the blue back button under the “Applications” heading you will grab the IP address from the string of text – it will be on the end.
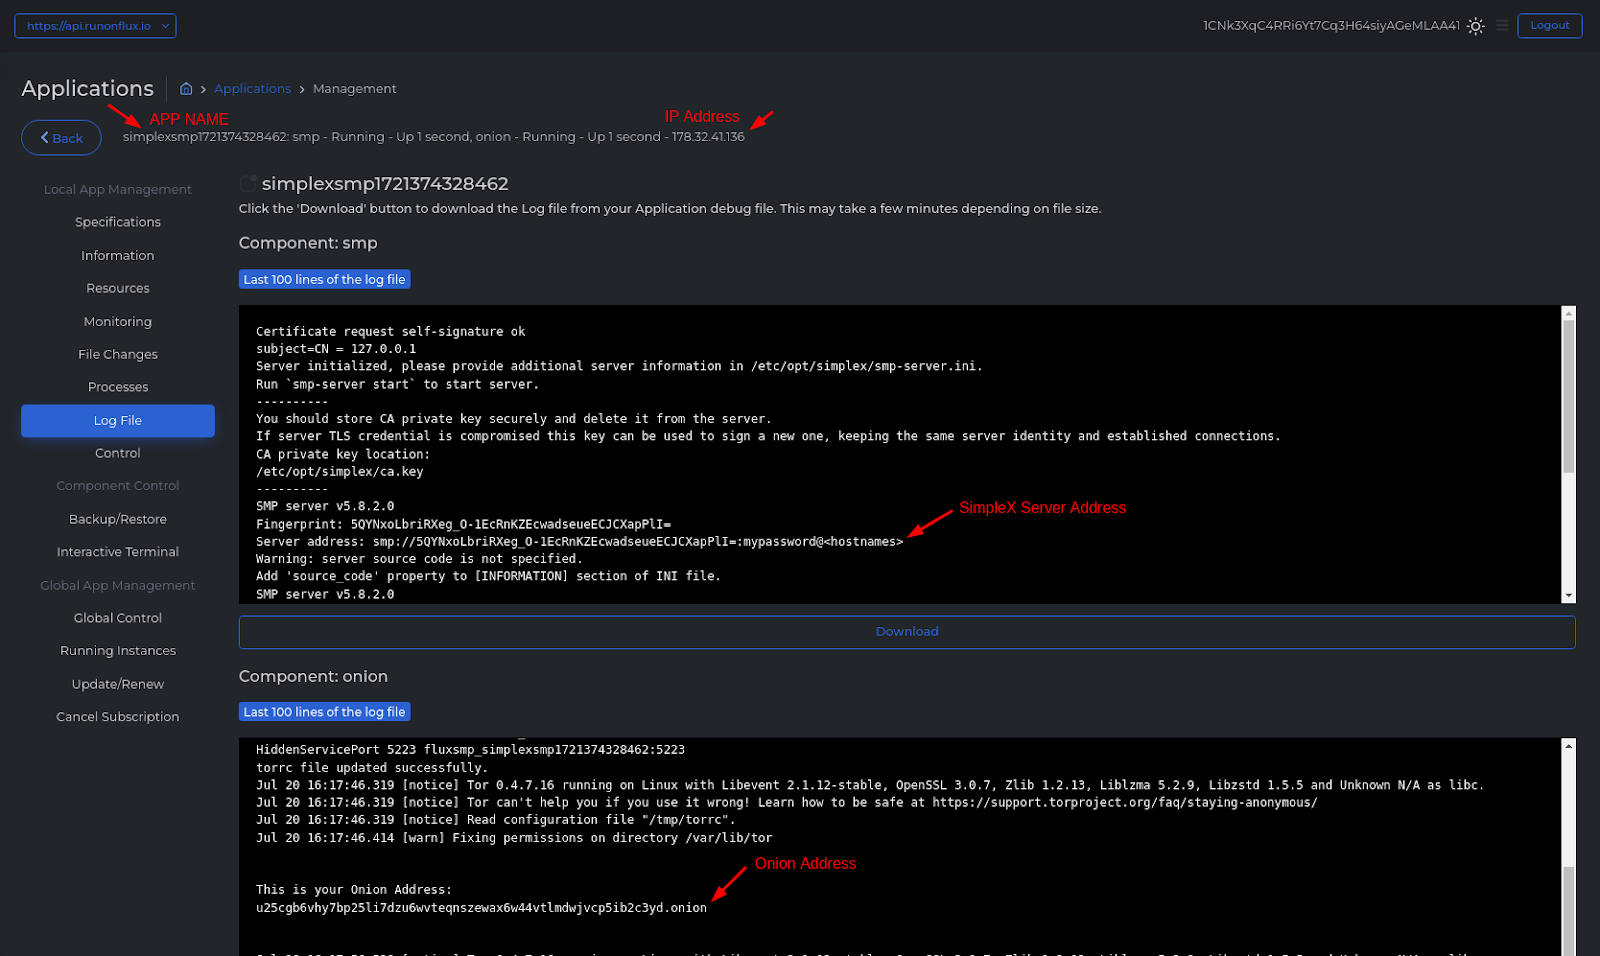
Now let’s bring it together and place the address in the simpleX client.
(remove <hostnames> and place the IP and Onion Address as shown)
smp://5QYNxoLbriRXeg_O-1EcRnKZEcwadseueECJCXapPlI=:[email protected],u25cgb6vhy7bp25li7dzu6wvteqnszewax6w44vtlmdwjvcp5ib2c3yd.onion
- Add your new SimpleX SMP Server to the client

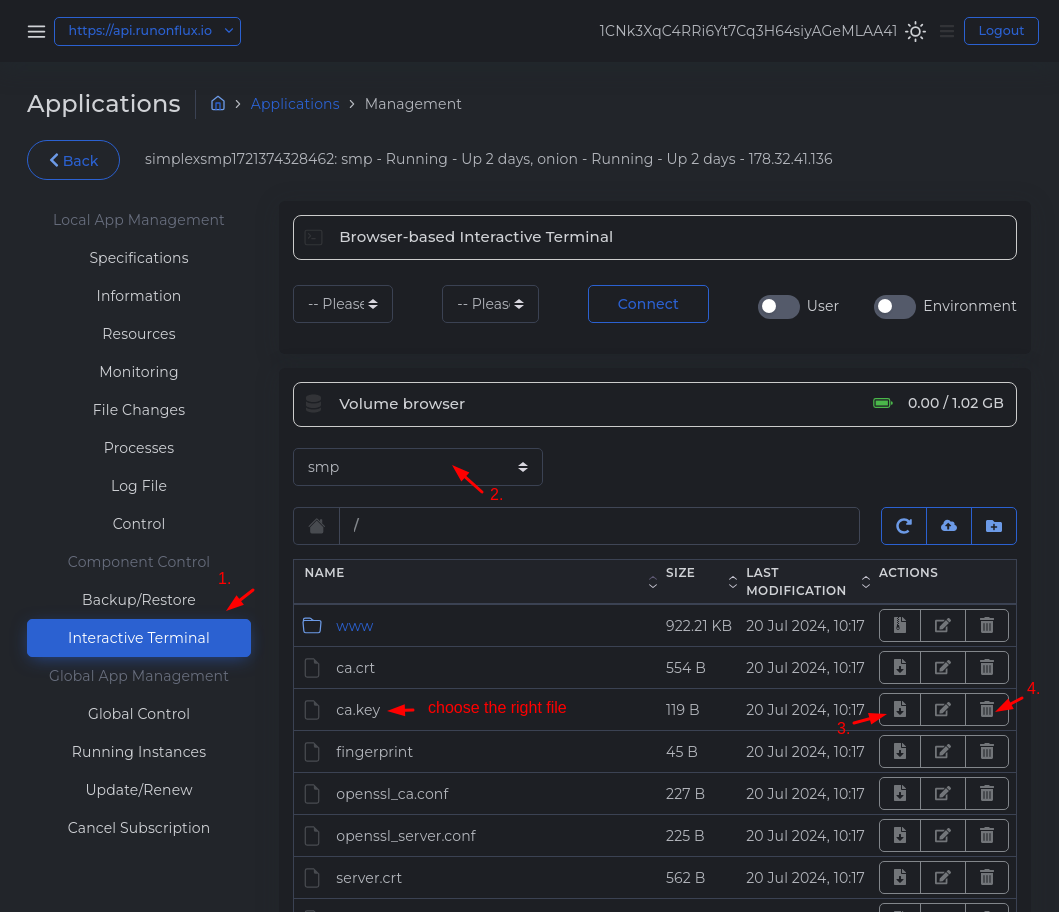
7. How To Backup SimpleX Server Certificate Authority
It is highly recommended that you complete this step.
You will be downloading (to backup securely) and then deleting the certificate authority cert file from the server.
We will use the “Interactive Terminal” from the “Management” side menu-bar.
In the next section (Section 8) you’ll learn how to remove the clearnet option.
8. How To Disable Clearnet On Your SimpleX SMP Server
- First you will need to access your deployment: See Section 2
- From the inside menu bar tap “Update/Renew”
- Toggle Off “Extend Subscription”
- Toggle On “Update Specifications”
- Scroll down to “Connectivity” section for smp component
- Delete the number 5223 from the Ports & Cont. Ports fields
(do not delete the brackets) - Delete the double quotes from the Domains field
- Update Your Flux SimpleX Deployment: See Section 4
If you completed Section 8 before starting so you can backup your Certificate Authority Key in a more secure way, you’ll want to take the steps below too:
- Complete Section 5 but in this case you want to generate a Hard Redeploy
- Once the container is running again, complete Section 7
- If you want clearnet back, redo the opposite of Section 8
- Then you can complete Section 3-6
Run Your SimpleX xFTP Servers on Flux
- Follow the same process from Section 1 in the SMP Server Guide to deploy your SimpleX xFTP Servers on Flux taking the point below into consideration:
- Choose SimpleXxFTP option instead of SMP
- Follow the same process from Section 6 in the SMP Server Guide to generate the server address taking the below point into consideration:
- The formatting of your address will use a different port than the standard port of 443 – but rather 34443; update the address similar to below:
xftp://[email protected],yvihopafg45mdjquyfsfx4aoq2f3g5f6ao5jqpmwm6z5p7lozjts3pyd.onion:34443- You can always update the amount of storage your SimpleX xFTP Server can use. You will need to update the QUOTA environment variable to ensure the server is allowed to use the new storage space.
- Follow the steps in Section 3, but take into consideration that you will be updating the QUOTA variable for the xftp component.
- Add more storage under the “Resources” section just below the “Environment” section by using the SSD option
- Make sure the number in the QUOTA variable match or are less than the number you set in the SSD option
- Complete Section 4 & 5 to save and deploy your changes