
In this article you will learn how to add a custom domain name to Flux Cloud if you didn’t provide one when deploying your WordPress site at the beginning.
We will:
- Show you how to log into a Flux node that has WordPress installed.
- Where to update and add your domain name on the node settings.
- Make the payment through Zelcore to apply the domain name changes to the Flux network.
How to Configuring Your Custom Domain
If you have entered a domain name in the registration part you can follow this guide to link it to your Flux wordpress Dapp. We’re going to show how to do it with CloudFlare, it will be similar with other providers:
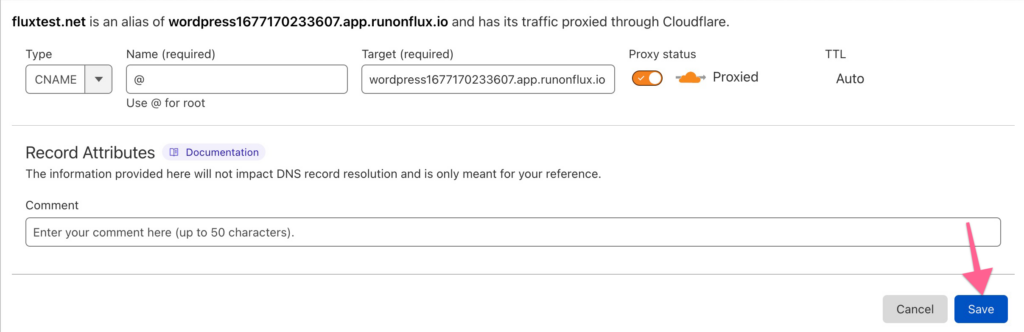
1- Once your website has been added to Cloudflare, Go to the DNS section and then Click Add Record.

2- for Type select CNAME
3- For name enter @
4- for Target enter your Flux generated domain name ie: wordpress1677170233607.app.runonflux.io
5- Click Save
6- This step is optional if you want to have a www record redirect to the bare domain
- Simply add another CNAME record
- Name: www
- Target: @
- Click Save
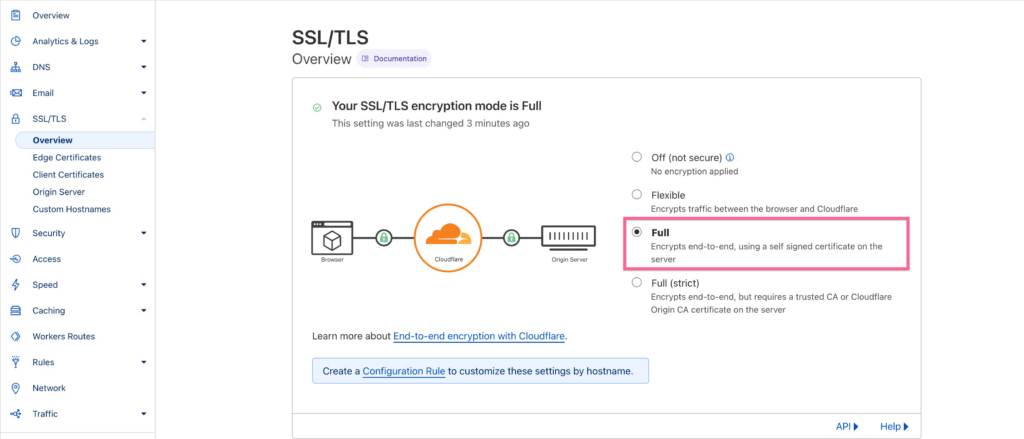
7- On the left side of Cloudflare, you will need to select SSL/TLS > Overview, and make sure SSL/TLS is set to full.
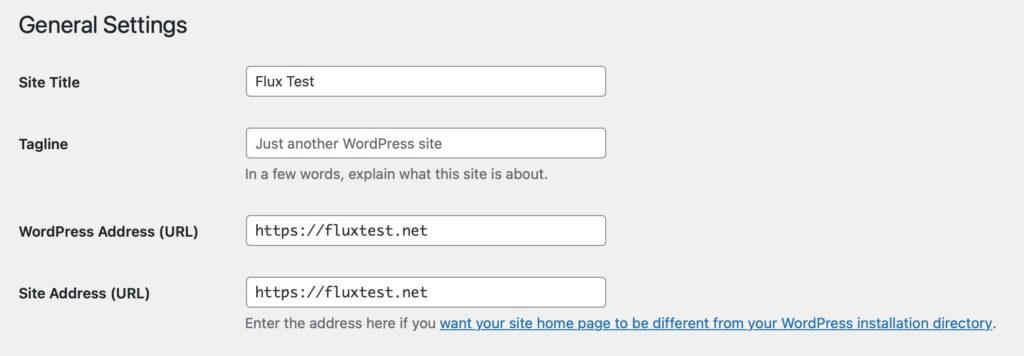
8- After the settings in Cloudflare have been applied, now it’s time to update the WordPress URL in the General settings.
- Login to your WordPress dashboard and select Settings > General.
- Replace the WordPress Address (URL) with the full domain name.
- Do the same thing for the Site Address (URL)
- Scroll down and click Save Changes
9- Now you should be able to login to the wordpress website using your domain name.
The next step is to point your domain name to Flux, you can use the following article to do that