
1- Click Plugins > Add New Plugin
2- Search for “updraft plus”
3- Install and Activate UpdraftPlus: WordPress Backup & Migration Plugin
4- from the top menu bar click UpdraftPlus > Backup / Restore
Here you can click backup Now to create manual backups, generated backups will be listed in the Existing backups section. You can download backups and store them yourself.

5- To configure the plugin for scheduled backups go to the Settings tab.
Here you can configure the plugin to take an automatic backup sat your desired schedules and store them on the storage service of your choice

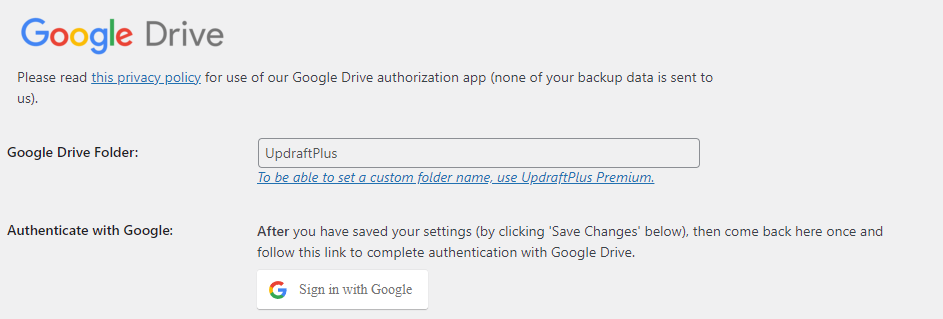
6- For this guide we will use Google Drive, Select Google Drive and Scroll down and Click Sign in with Google
7- Page will be redirected to let you choose the account you want to link to updraft plus. Select the account you want to link and click Allow
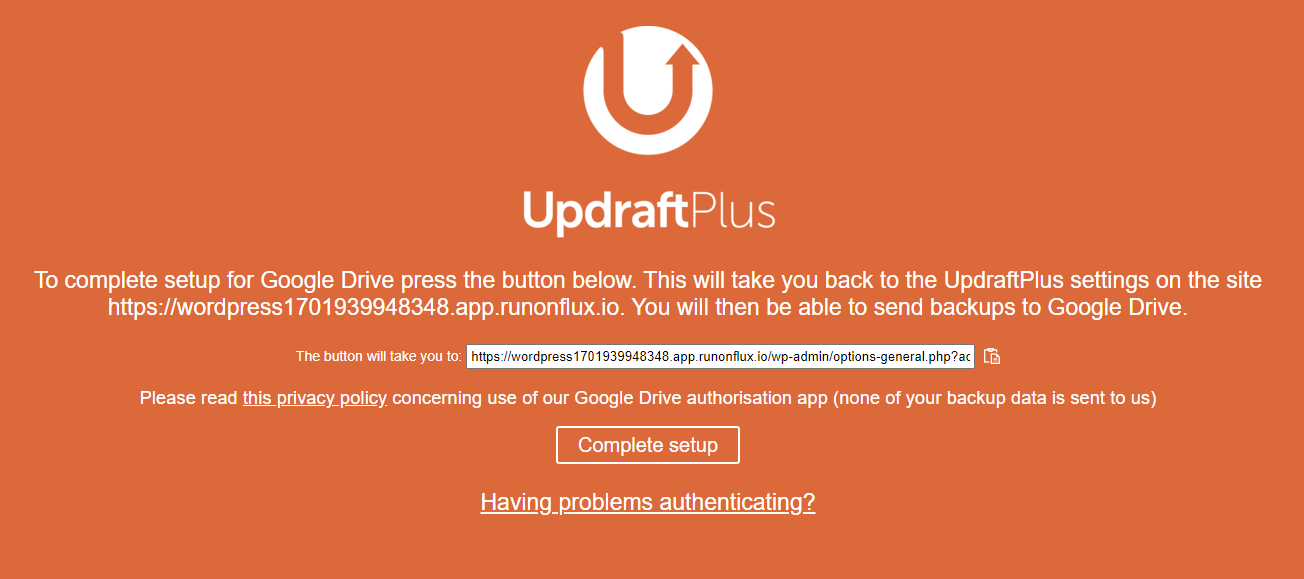
8- Click Complete Setup Button
9- Click Save Changes