
Welcome to WordPress on Flux Cloud – the future of web development! Our platform combines the world-renowned WordPress CMS with the latest Web3 technology to bring you unparalleled website performance and security.
Installing WordPress on Flux
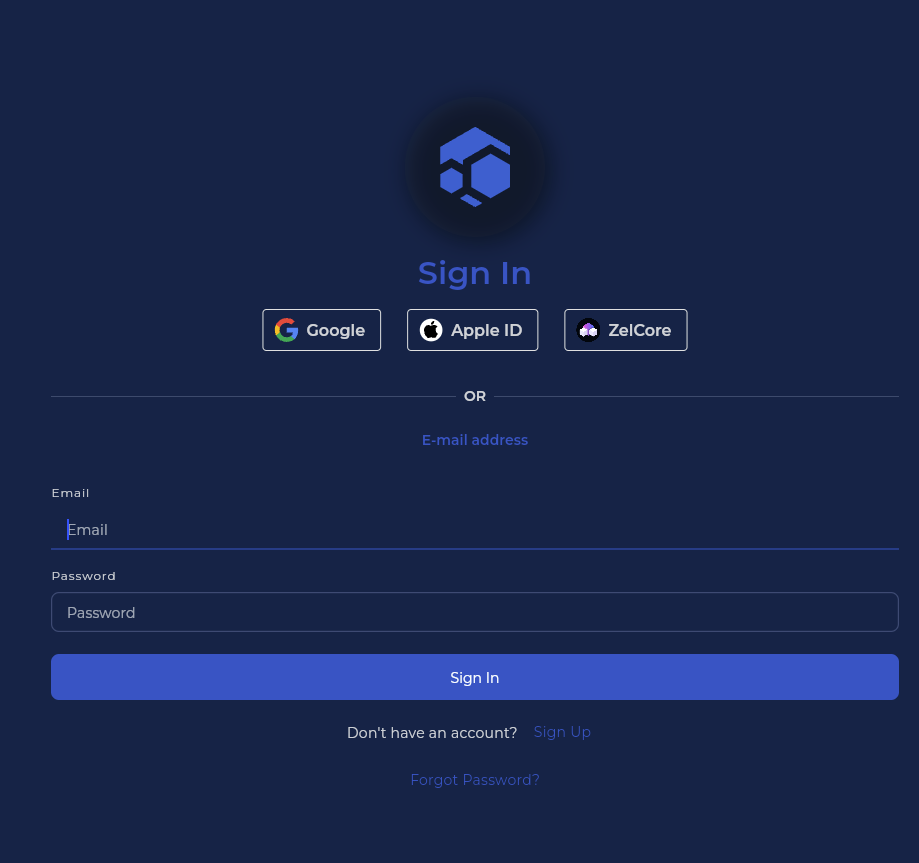
- Go to https://cloud.runonflux.io/, Click Sign In or Sign Up. You will be redirected to this page – register or sign in with your favourite method.
- Navigate to WordPress on the left menu then fill in the required fields.
- Enter WordPress Dapp Name, Enter your email in the Email for Renewal Alerts this email will be used to inform you for renewal alerts
- Flux will generate a subdomain for your app automatically, but if you want to use a domain name enter it in the Domain Name (Optional) field , Select Payment Length
- If you are a pro and want to directly connect to database in the future you can add your IPs to the List of Whitelisted IP’s

Select your Performance Plan
- Basic – Suitable For Individuals And Small Businesses, Perfect For A Simple Website Or Blog
1 Core CPU, 2 GB RAM, 13 GB SSD, 3 Instances
- Standard – Ideal For Growing Businesses, Good For A Site With More Content
2 Core CPU, 3 GB RAM, 25 GB SSD, 3 Instances
- Pro – Great For A Larger Site With Higher Traffic Demands
4 Core CPU, 4 GB RAM, 60 GB SSD, 4 Instances
- Enterprise – Ideal For Large-scale Enterprises
6 Core CPU, 8 GB RAM, 120 GB SSD, 5 Instances
- Select your Deployment Location.
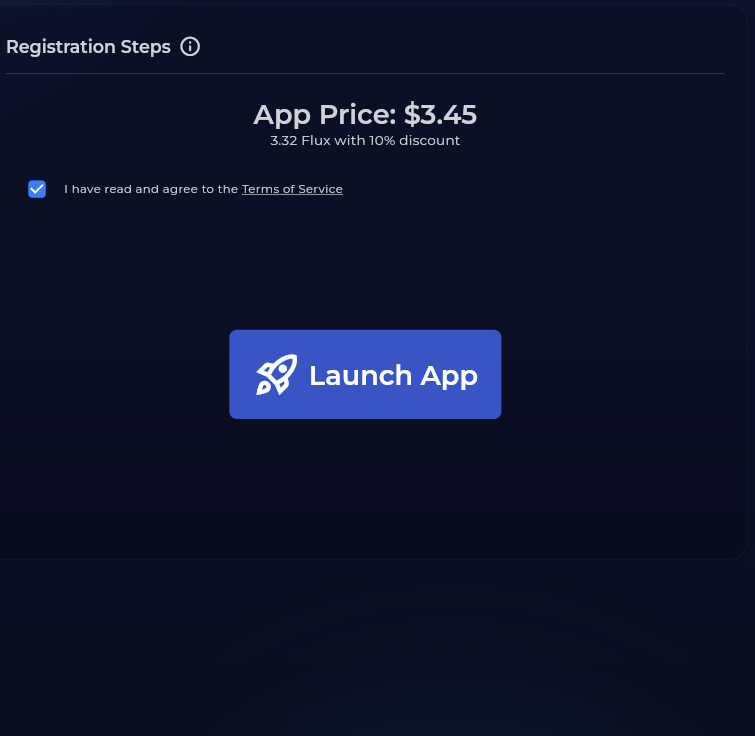
Review then Click Sign Terms and then scroll down and click I Agree
Click Launch App and follow the on screen instructions.
- NB: If you have logged in with Zelcore – please sign the message and follow the instructions.
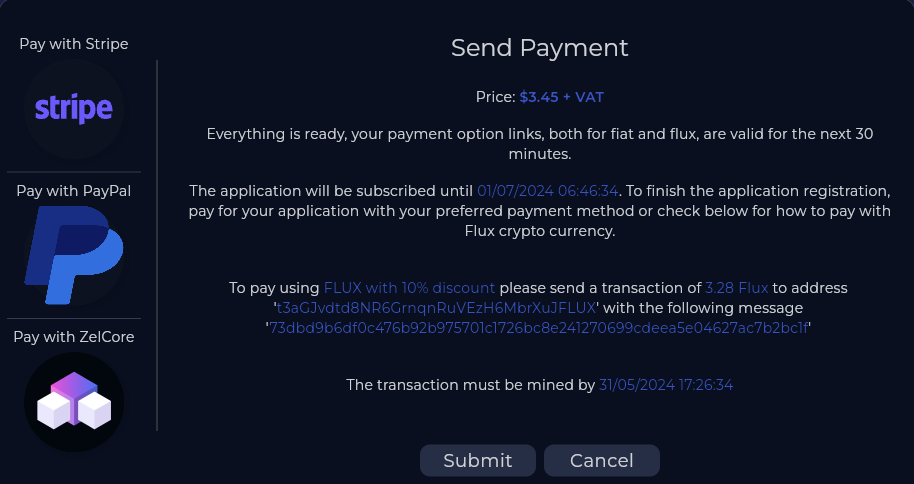
- App Payment – Click your chosen Payment Method. Stripe (Card Payments), Paypal or Pay with Flux with Zelcore – After payment you will be redirected – Thats it soon you will be running your WordPress site on Flux Cloud! – Wait few minutes for the app to be registered.
Example: https://wordpress123456789.app.runonflux.io. If there is a problem and you cannot register your site, please contact us and we’ll restart setup.
You will see the wordpress installation page here, if you’re seeing the “Deployment in process” Page, wait for a few minutes and refresh the page.
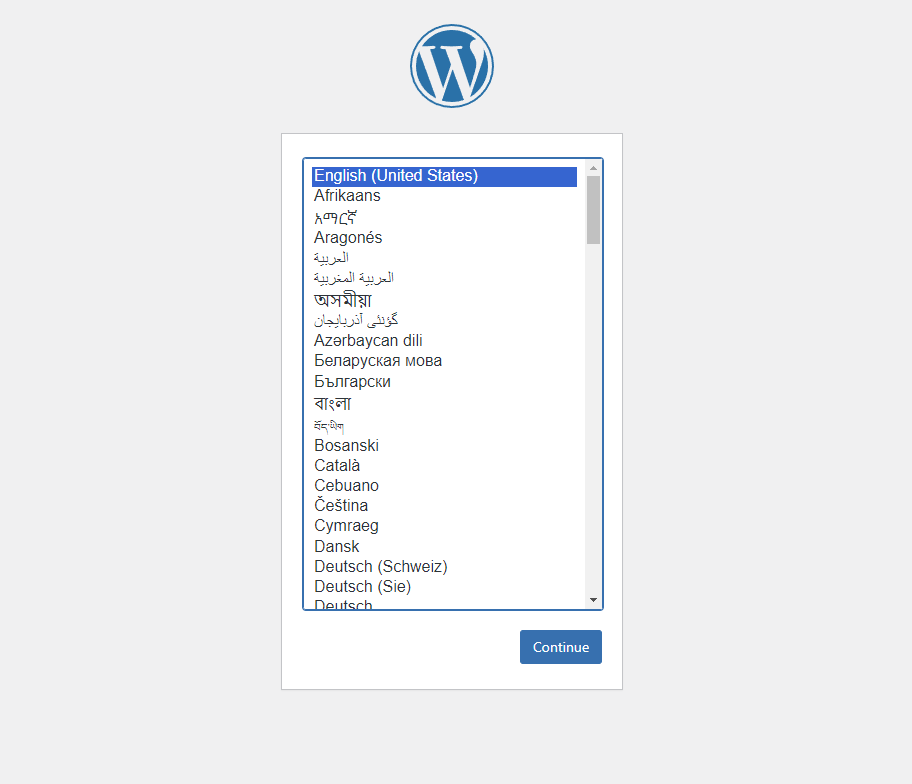
- In the WordPress installation page, Select your desired language and click Continue. Put in a Site Title, Username, Password (make sure it’s a strong one) and an email address – Select Search engine visibility
- Click Install WordPress – Thats it, Now you can start using your WordPress site!
If you would like to configure your own Custom Domain name – follow this guide.
Try it now – https://wordpress.runonflux.io/